OSIC Baremetal (Ironic) Access

Quick Start List:
Getting started
-
Login to the OSIC at "https://cloud1.osic.org":

-
Access Cloud1 "RegionOne" to build your jump box:
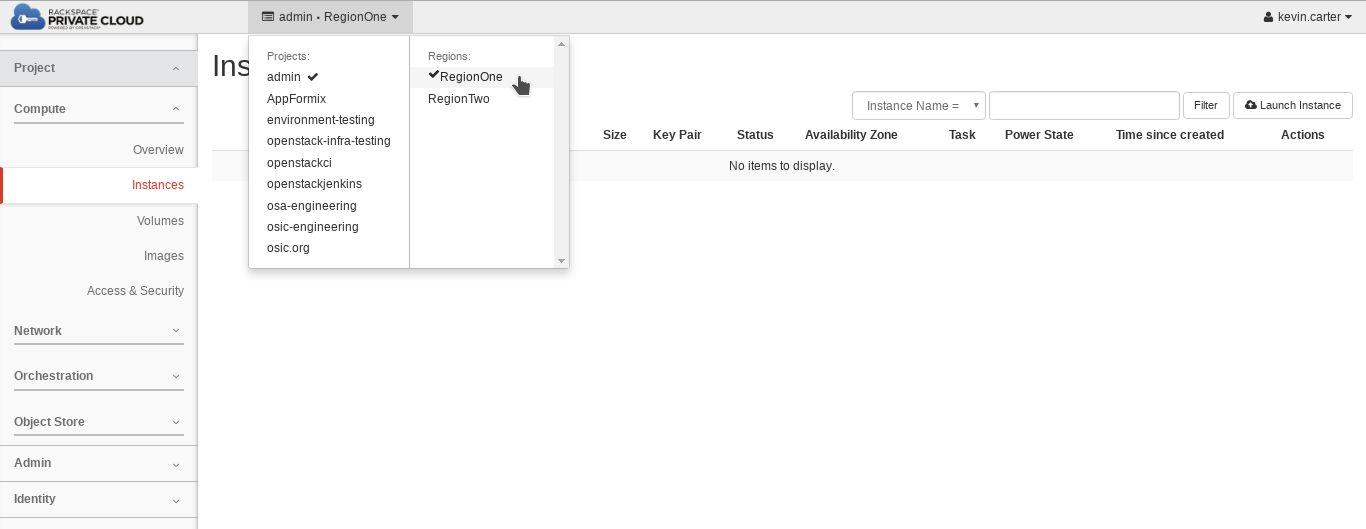
-
Create a VM:
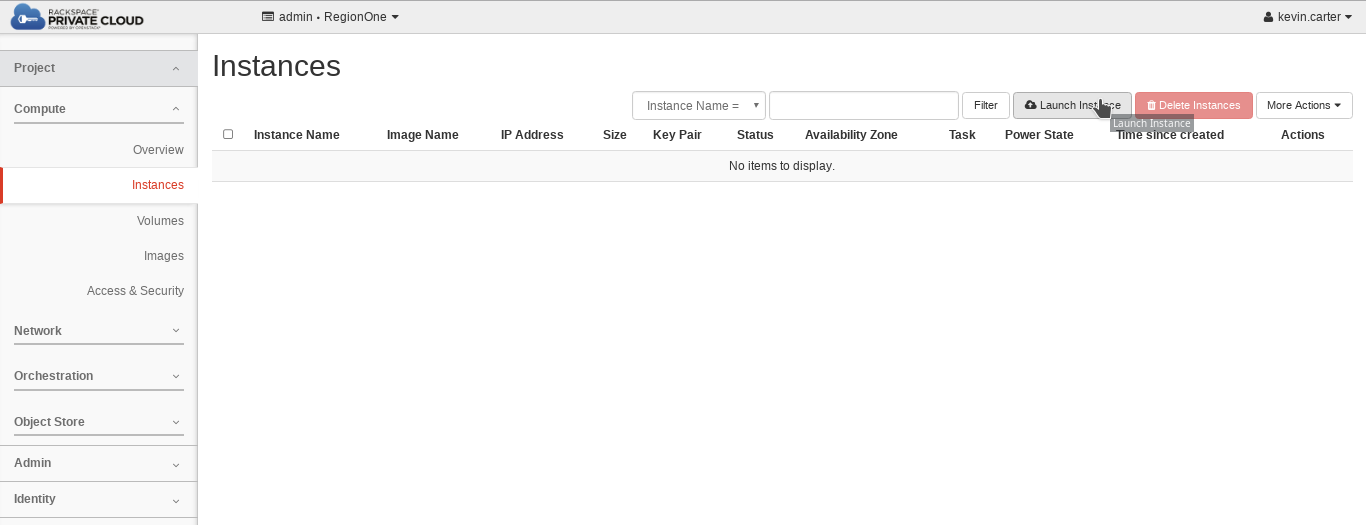
-
Name the VM:
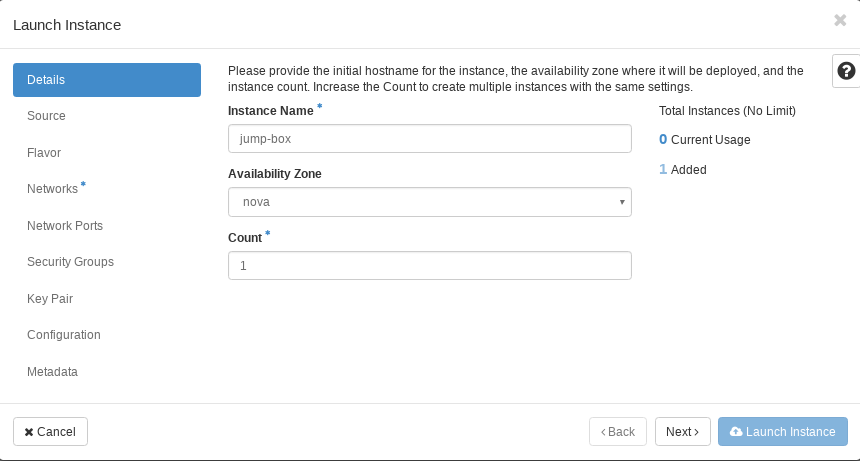
-
Select the baremetal appliance image: Note that the image used for accessing baremetal is an "Instance Snapshot".
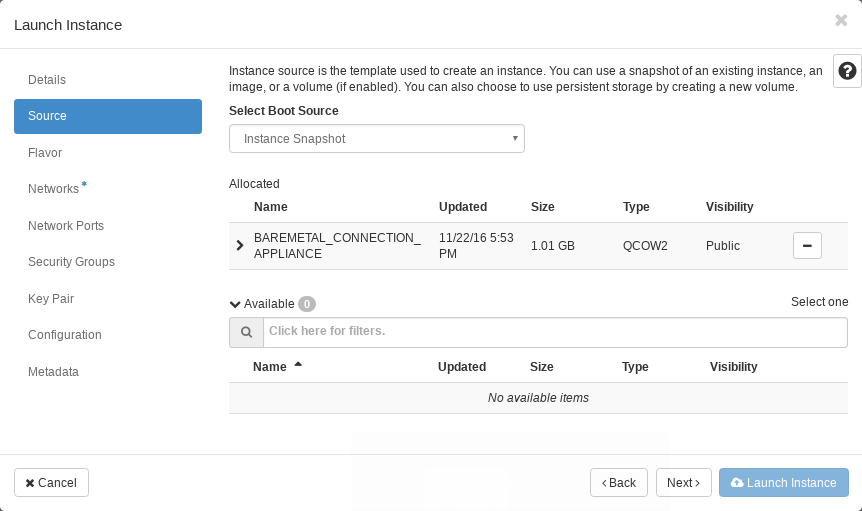
-
Select the flavor: The flavor used does not need many resources. I recommend simply using
m1.small.
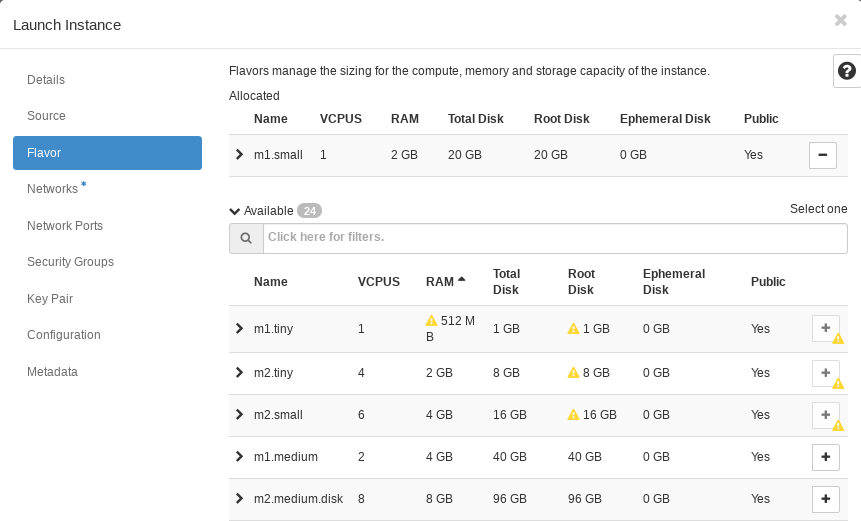
-
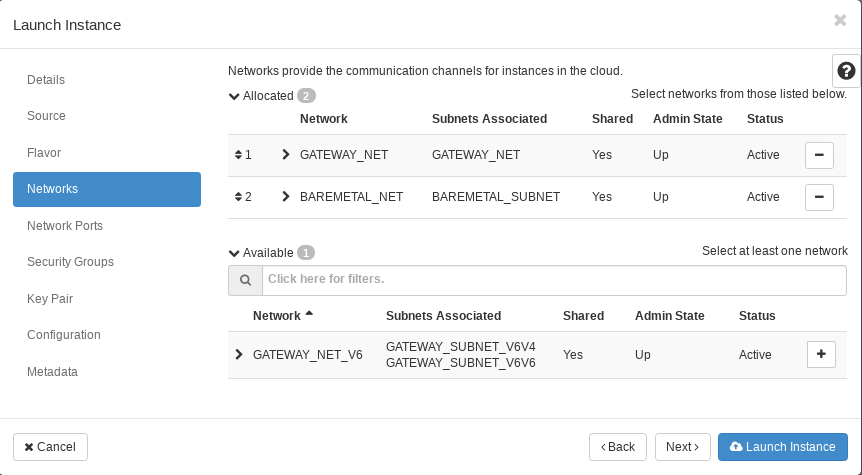
Add networks to the VM: The VM will need to use 2 networks. GATEWAY_NET will be the first network and BAREMETAL_NET will be the second. This combination will allow for public access using an IPv4 network and pass through for baremetal.
-
Add your key to the VM: If you fail to add an SSH key to the node you will not have access and will need to start over.

Getting SSH Access
PUBLICIP_OF_ACCESS_NODE="<IP_ADDRESS_FROM_NODE_YOU_CREATED>"
Now create an ssh config that will allow you to proxy your connections through the access appliance.
cat > ${HOME}/.ssh/osic-proxy-ssh <<EOF
host osic-proxy-bastion
  HostName $PUBLICIP_OF_ACCESS_NODE
  User ubuntu
  ProxyCommand none
  ForwardAgent yes
  ControlPath none

Host *
  ForwardAgent yes
  Compression yes
  CompressionLevel 7
  TCPKeepAlive yes
  ServerAliveInterval 60
  ControlPersist 10h
  StrictHostKeyChecking no
  VerifyHostKeyDNS no
  HashKnownHosts no
  ProxyCommand ssh -F ${HOME}/.ssh/osic-proxy-ssh -A osic-proxy-bastion 'nc %h %p'
EOF
With the ssh config in place access is quite simple using the following command after you've provisioned your baremetal resources.
ssh -o StrictHostKeyChecking=no -F ${HOME}/.ssh/osic-proxy-ssh <USER>@$TARGETNODE
Optional
You may also wish to create an alias in your user's profile giving you simple command line access.
# On Apple MacOS
echo "alias osicssh='ssh -o StrictHostKeyChecking=no -F ${HOME}/.ssh/osic-proxy-ssh'" >> ~/.profile

# On most Linux Distro's
echo "alias osicssh='ssh -o StrictHostKeyChecking=no -F ${HOME}/.ssh/osic-proxy-ssh'" >> ~/.bashrc
If you create the alias you will need to reload your profile before using it. That can be done by simply logging out and back into the terminal session.
One the alias is loaded you can access your target nodes using the following command.
osicssh <USER>@$TARGETNODE
Getting HTTP Access
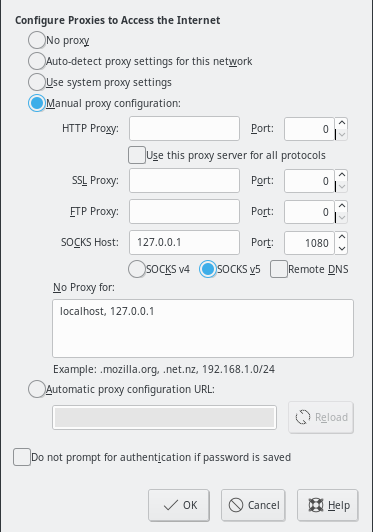
Once you're able to ssh to a target node the ssh config will setup a SOCKS proxy allowing you to establish an HTTP connection to your cluster. To access the SOCKS proxy you will need to setup your browser accordingly.
The following example shows how to configure Firefox using a SOCKS proxy.
-
Start Firefox.
-
Access the Firefox settings panel
-
Navigate to the "Network" tab within the Firefox settings panel.
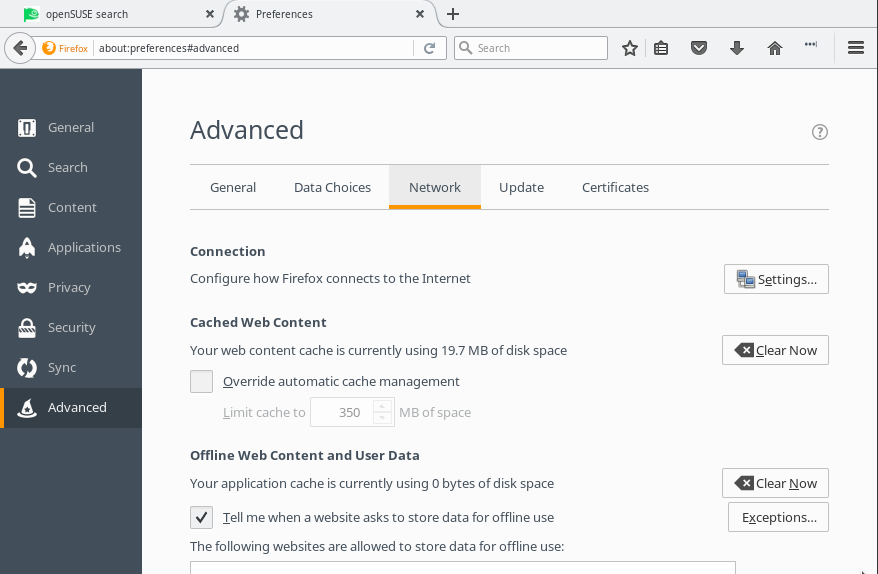
-
Click "Settings..." under the "connection" section from within the "network" tab.
-
Select "Manual proxy configuration:" and add "127.0.0.1" to the SOCKS Host: box using port "1080". Then in the No Proxy For: text box add "localhost, 127.0.0.1". Now click "OK".
-
Exit the settings window and tabs.
-
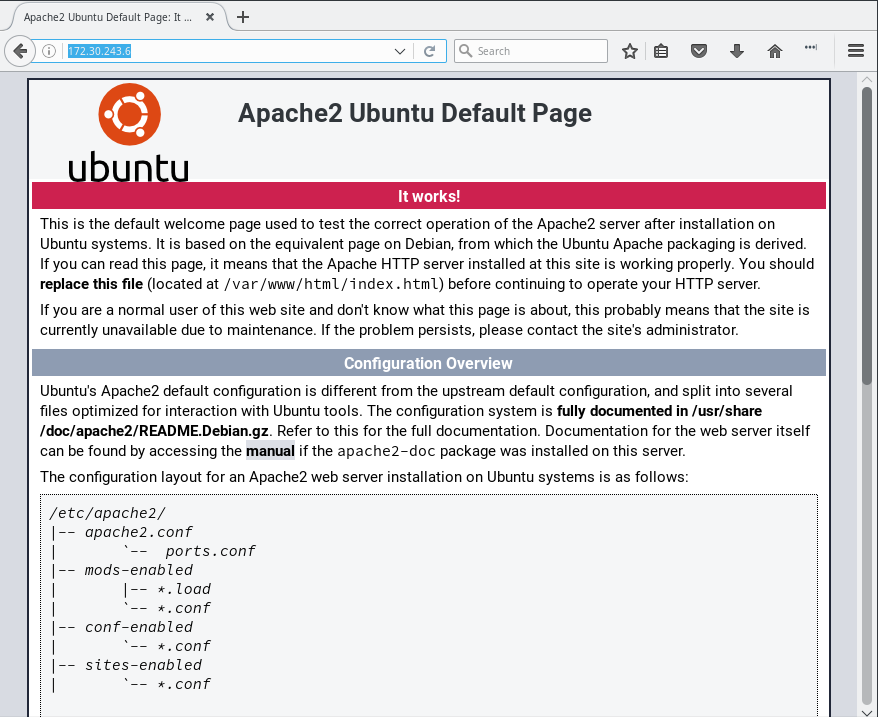
You will now have HTTP access to the nodes within your environment. Simply navigate to the IP address of a given node within your browser.
Adding Keys to an Existing jump box
A single jump box can support a near endless number of users. If you wish to provide access to your environment to multiple users you can do so by simply logging into the jump box as the "ubuntu" user and adding an ssh key to the "authroized_keys" file found at /home/ubuntu/.ssh/authorized_keys. You will also need to add that key to any physical node you wish to share.
Building Baremetal nodes
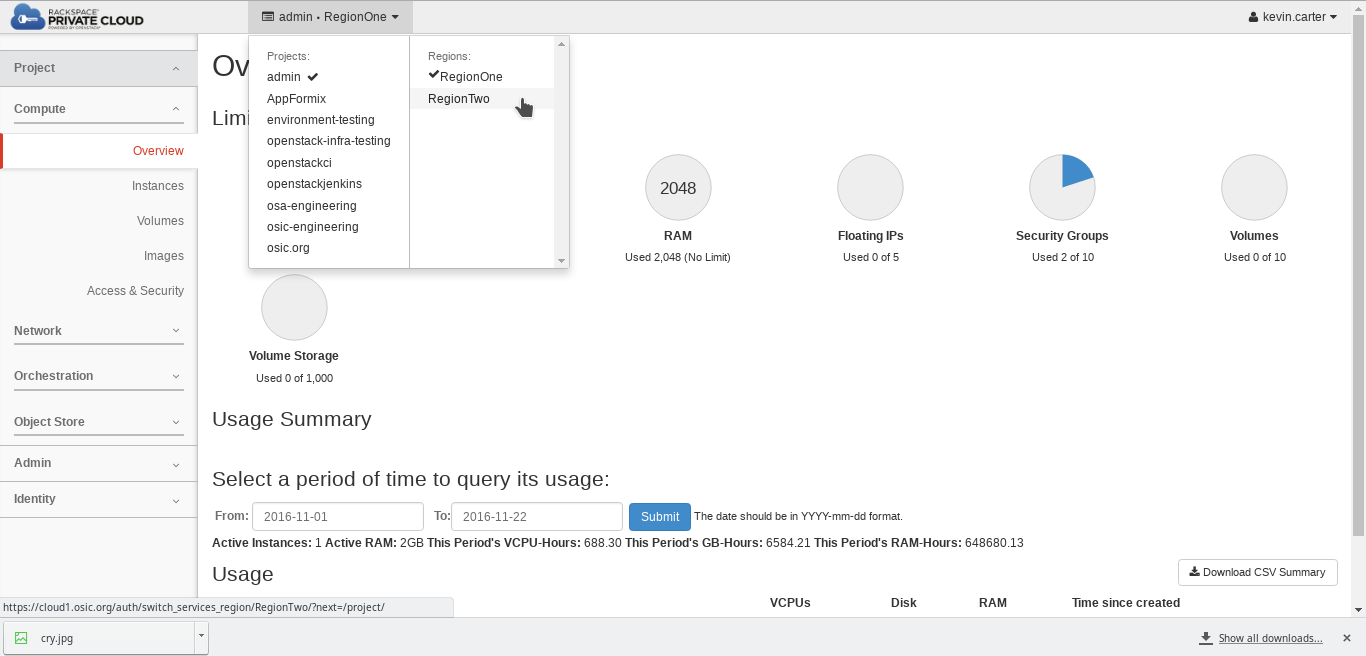
Creating a baremetal nodes is just as simple as building new VMs. To create the baremetal nodes you will need to access RegionTwo from within Horizon and provision nodes based on the assigned quota from within your project.
-
Login to the cloud and access the "Instances" pane in "RegionTwo" and then select "Launch Instance.
-
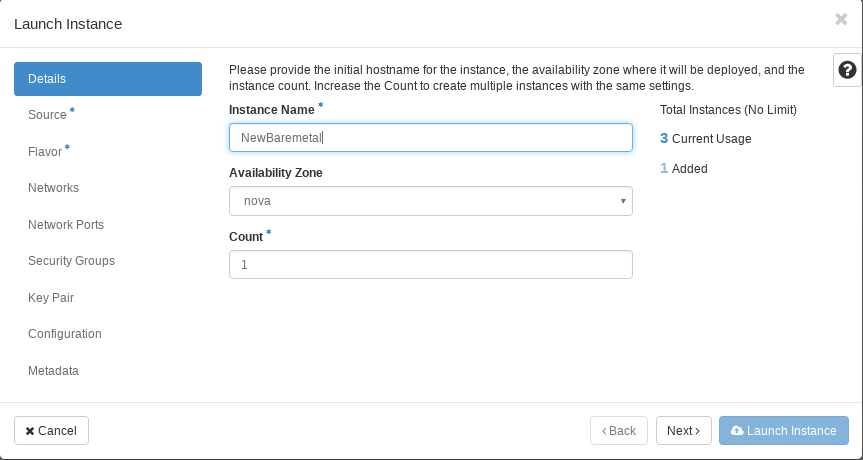
Boot the new Instance:
-
Name the node: Also notice that you can provision multiple nodes at the same time. This is handy when you're creating a lot of hosts all of the same type and image.
-
Select the Image:
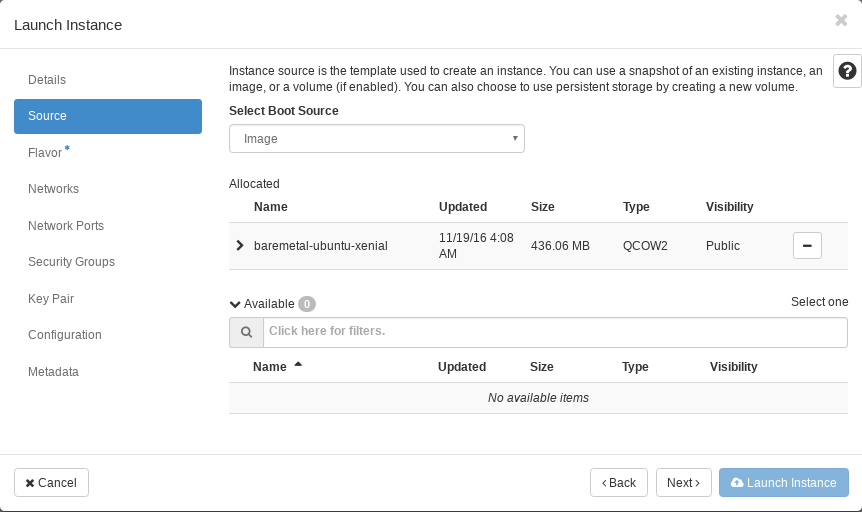
-
Select the Flavor: Notice there are three flavor types each building a physical node with different storage characteristics.
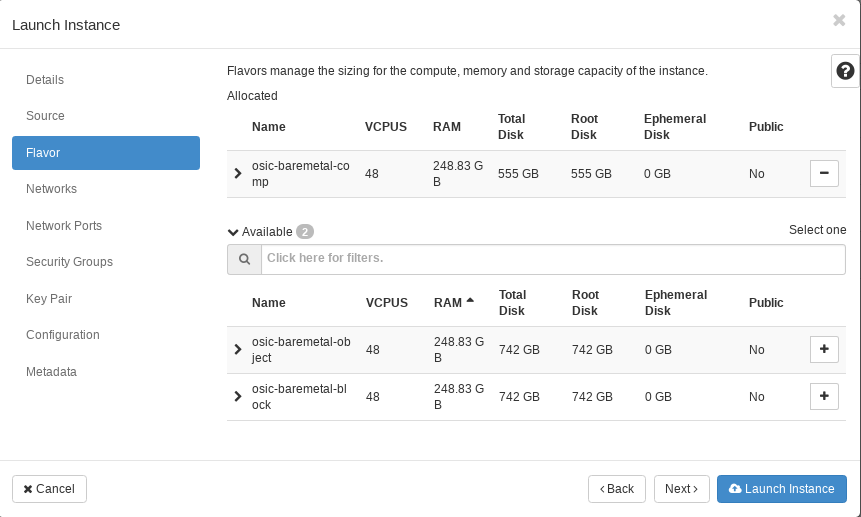
-
Add you key to the node. If you do not do this now you will need to start over as there will be no access provided to the physical resource.
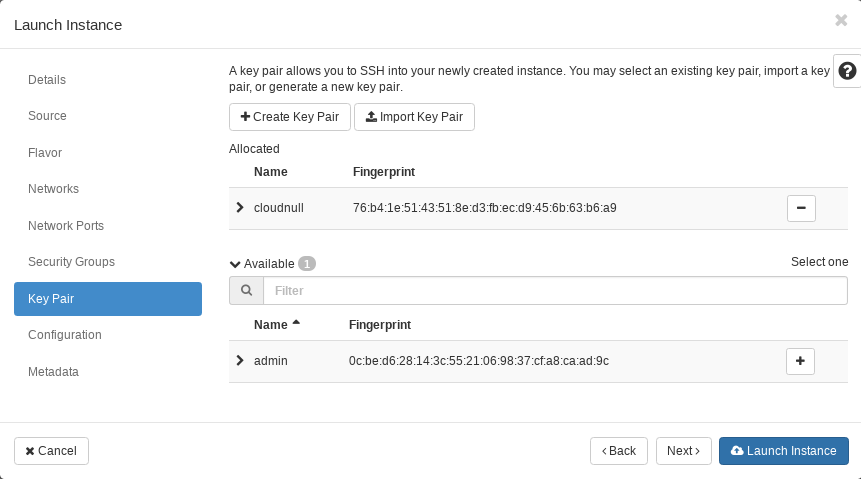
-
Wait for your nodes to come online and be patient as getting physical resources online can take a little while. When the nodes are active you will be able to use your jump box to access the resources.
Notes
-
For the socks proxy to work you will need to be SSH'd into one of your hosts which automatically creates the tunnel.
-
All Ironic nodes will come with both an IPv4 and an IPv6 address. If you wish to use IPv6 the host will need to have port 0 and 2 bonded. This requirement is due to a known bug in the Nexus 3k switches which drop multicast traffic when bonding is enabled and a node has an interface in standalone mode.
-
A single jump box can support a near endless number of users. If you wish to provide access to your environment to multiple users you can do so by simply logging into the jump box as the "ubuntu" user and adding an ssh key to the "authroized_keys" file found at
/home/ubuntu/.ssh/authorized_keys. You will also need to add that key to any physical node you wish to share. -
When provisioning a new baremetal node the time it takes to become active can take nearly 30 minutes, assuming there were no issues or delays in scheduling.
-
If a node is active but unreachable try hard rebooting the instance. There have been occasions where cloud-init does not do everything perfectly on the first boot which requires a reboot to finish.