Lenovo X1 BIOS updates without Windows

The X1 Carbon (I've the Gen 4) is a Fantastic machine and works wonderfully with Linux. I purchased my unit back in December as an upgrade to my aging Lenovo X230 and I really couldn't be happier. Sadly, there's one aspect of the system which tough to grapple with and that's BIOS / Firmware updates. Lenovo, targeting the masses, only provides system updates under Microsoft Windows so when it comes for folks running Linux to update their firmware the process can be little cumbersome. Albeit cumbersome to get started, the firmware updates are needed especially in terms of security and stability.
This post will walk you through the process for applying a BIOS update to the system without having to run Windows or a WinPE environment. You will, however, need a USB stick with at least 64MiB of storage and some limited Command line knowledge.
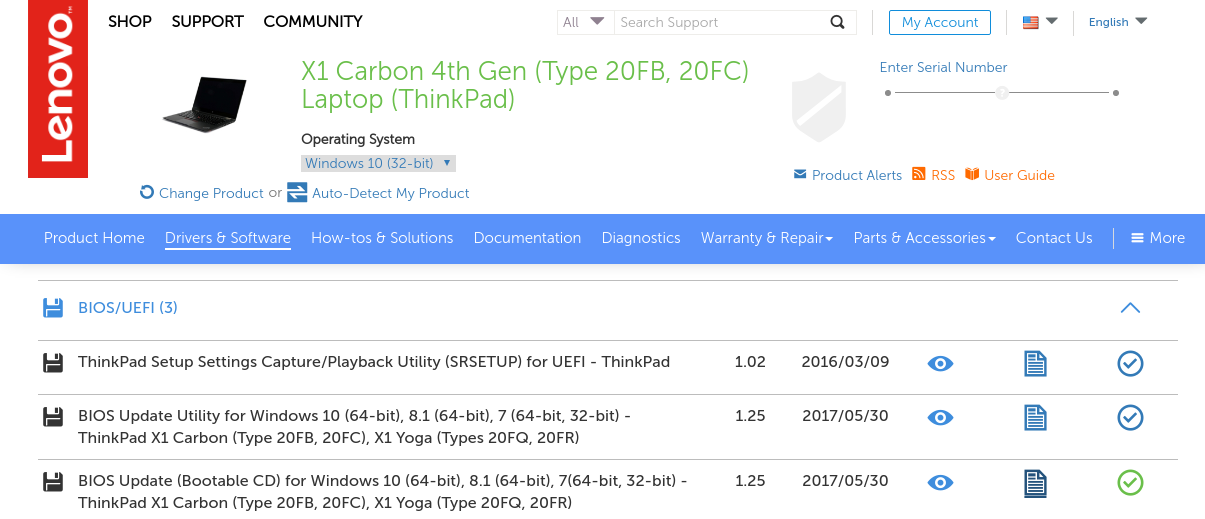
First thing to do is to download the BIOS ISO from Lenovo
With the bios ISO downloaded we'll open up a terminal and get the rest done on the CLI. To convert the ISO into an image, which can be made bootable and transferred over to our USB storage device, we'll need to install the package "genisoimage". This package will contain the CLI utility geteltorito which we'll use to convert the ISO into an IMG.
Install the "genisoimage" package using your distrobution package manager:
- OpenSUSE:
zypper install genisoimage - Ubuntu:
apt-get install genisoimage - Fedora:
dnf install genisoimage
NOTE: The package manager on your system will vary as will the name of the package.
With the package installed change directories to the location where the downloaded ISO exists and then run the following command:
# Replace the variable ${NAMEOFISO} with the name of the file you downloaded before
geteltorito -o boot.img ${NAMEOFISO}
Once this command completes you will have a new file named "boot.img" which is the converted copy of the "${NAMEOFISO}" file. This file will be used as the source of our boot media.
At this point plugin your USB stick, make sure there's nothing on it that you need or want, the next command will erase your USB stick with the contents of the "boot.img" file.
With the USB still plugged in run the following command as root: blkid. The output of the command will look something like this
/dev/sda1: SEC_TYPE="msdos" UUID="XXX" TYPE="vfat" PARTLABEL="primary" PARTUUID="XXX"
/dev/sda2: UUID="YYY" TYPE="ext4" PARTLABEL="primary" PARTUUID="YYY"
/dev/sda3: UUID="ZZZ" TYPE="crypto_LUKS" PARTLABEL="primary" PARTUUID="zzz"
/dev/mapper/part3: UUID="AAA" TYPE="LVM2_member"
/dev/mapper/system-swap: UUID="BBB" TYPE="swap"
/dev/mapper/system-root: UUID="CCC" TYPE="ext4"
/dev/mapper/system-home: UUID="DDD" TYPE="ext4"
/dev/mapper/system-var: UUID="EEE" TYPE="ext4"
/dev/sdb1: SEC_TYPE="msdos" LABEL="USBSTICK" UUID="111" TYPE="vfat"
Within this output you'll see your USB stick and the device path. In my case, the USB stick is /dev/sdb1 so the device path is /dev/sdb. With the path to your device in hand, we'll change directories to the location of the "boot.img" file and run the following command to transfer the image from our image file to our block device:
dd if=boot.img of=/dev/sdb bs=1M
Once this command is complete you'll be ready to reboot your system and apply the bios update. The process to apply this update is fairly straight forward:
- Reboot
- Interrupt the boot process by pressing "Enter"
- Press F12 to select a one-time boot device
- In the onscreen menu, you should see your USB hard drive select this drive using the arrow keys and press "Enter".
- The screen will turn black, then grey and present your with three optins. Here, simply follow the onscreen instructions.
Once you've applied the patch the system will go through a couple patch phases and reboot a number of times. After it's all complete your system will reboot into the installed OS (For me that's OpenSUSE) and we're done.